I decided to make a personal AI assistant using the M5Stack StickC Plus2.
7 min read
Stickynotepickles
I decided to build a client for my AI project. Before this, I trained a model to create my personal JARVIS. I used mistral-7b-finetuned as a base model from Hugging Face, then fine-tuned it for my own needs. I used Google Colab for training, and after 1–2 hours, my model was ready. (I also want to write about how I trained it, my code, API, etc. that’s another blog topic.)

Table of Contents
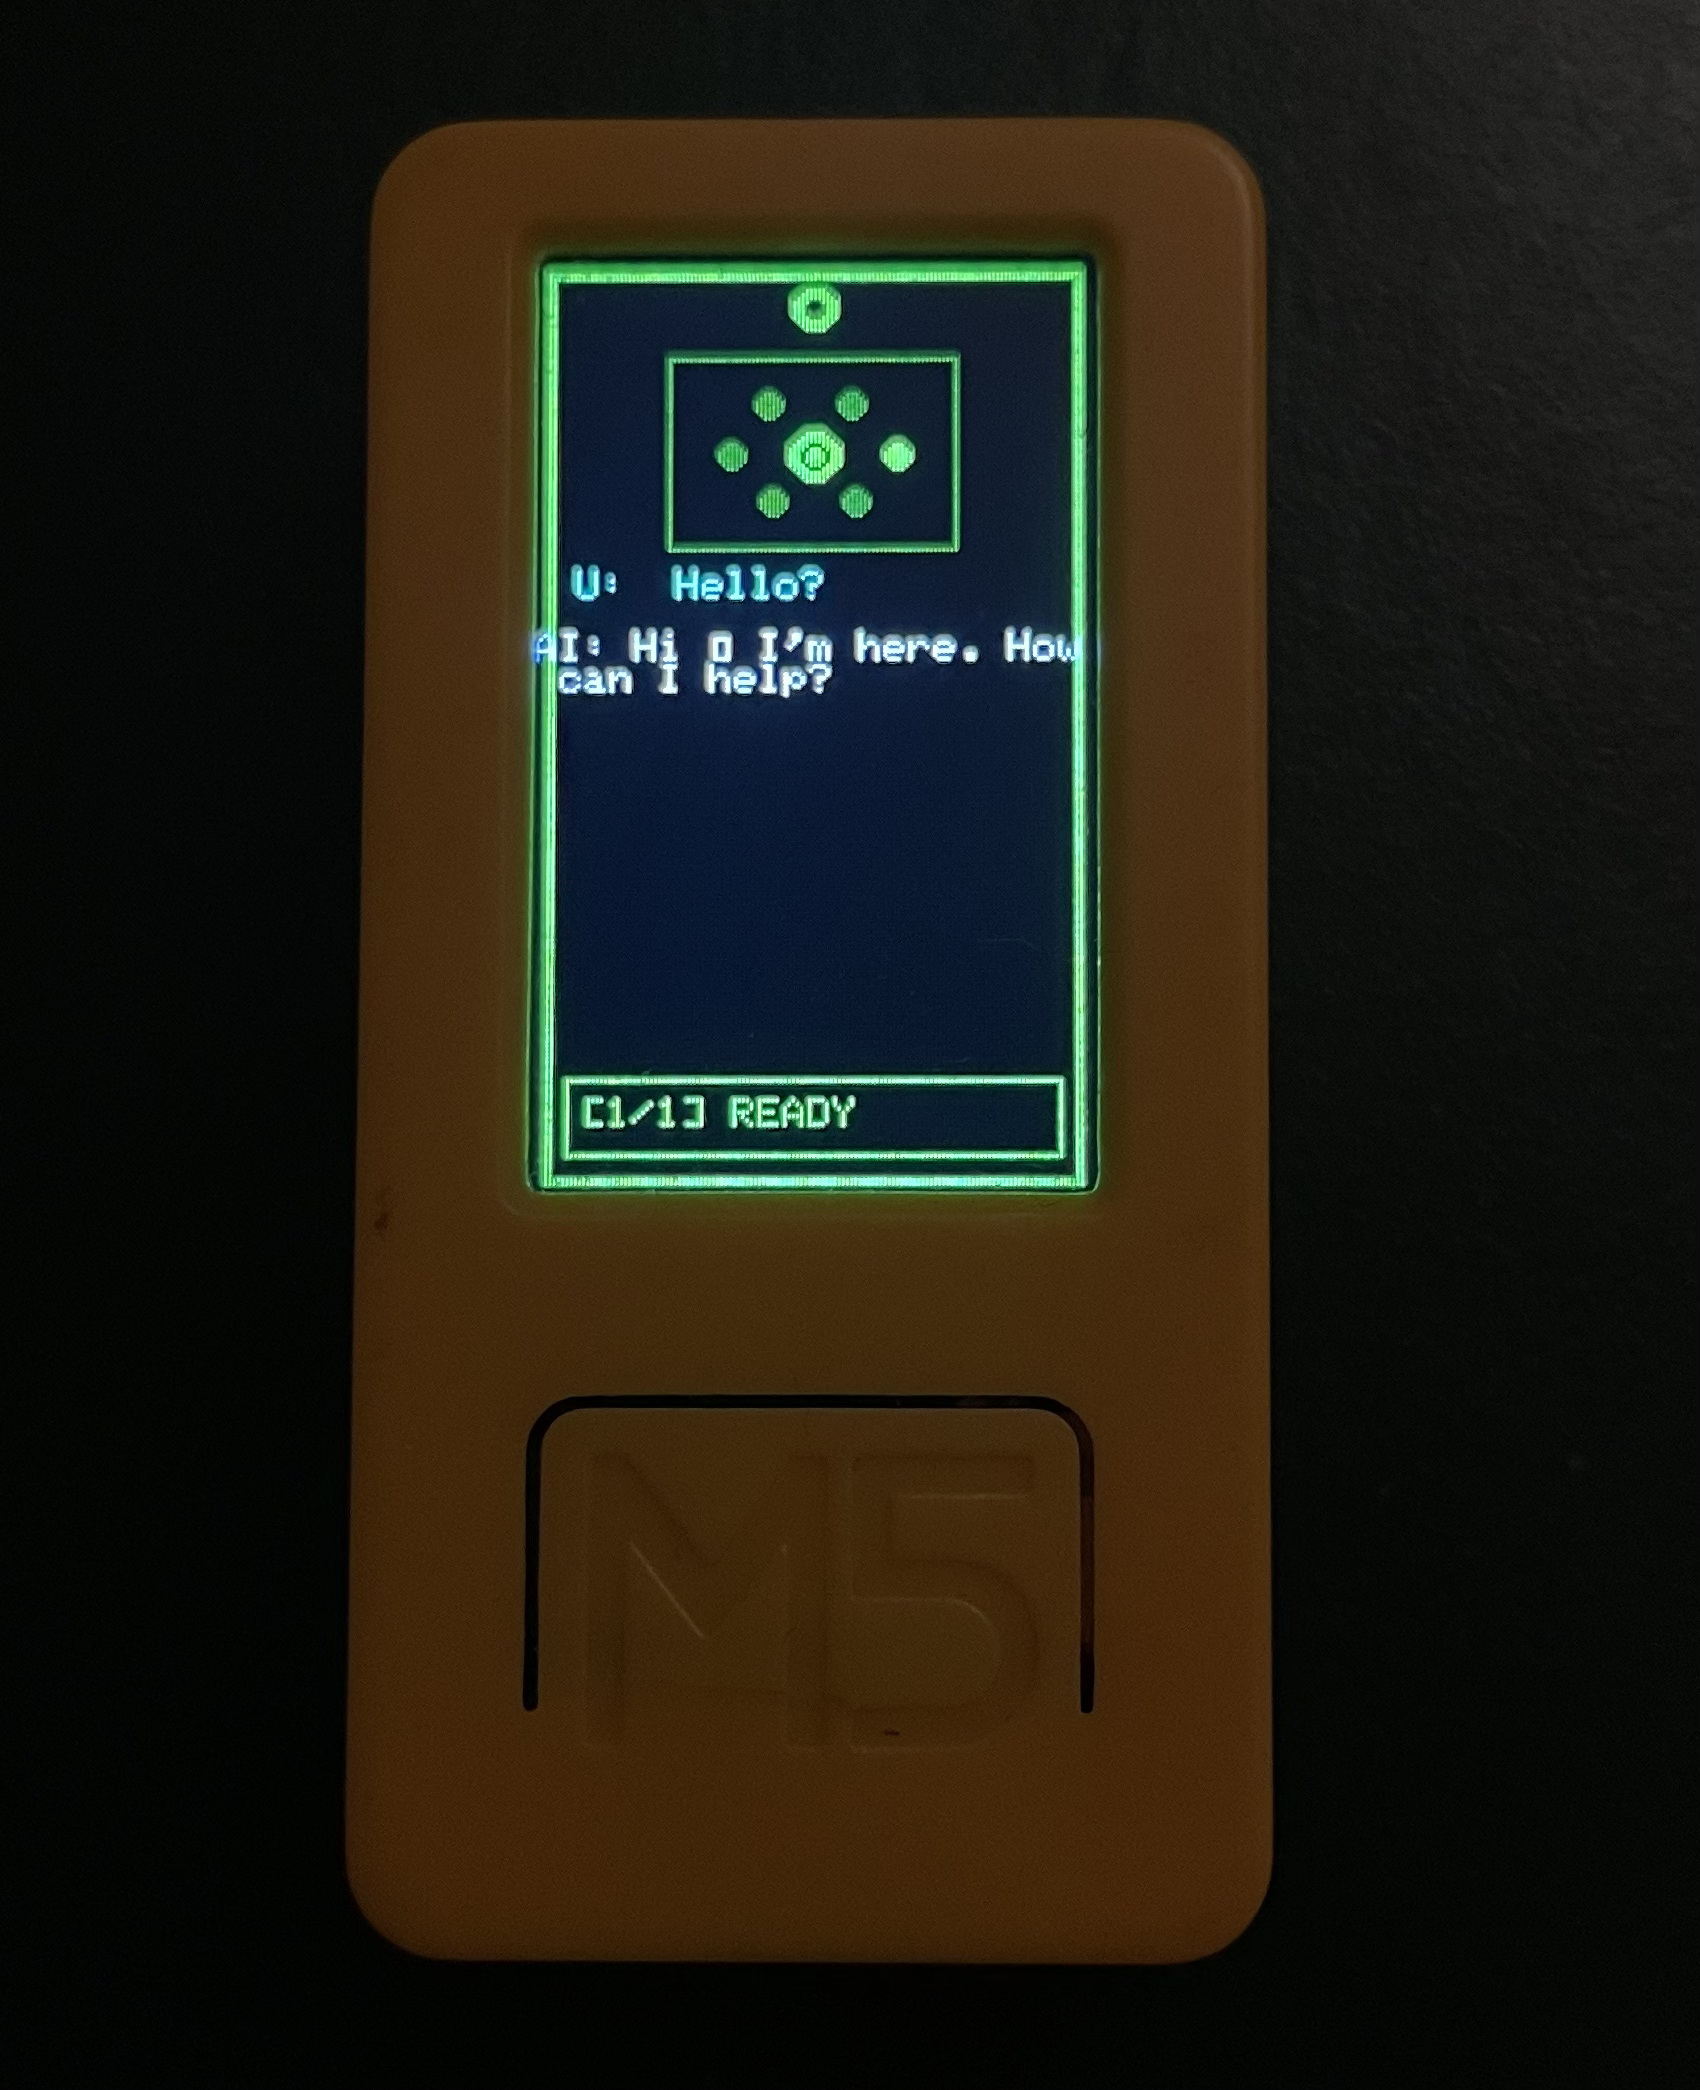
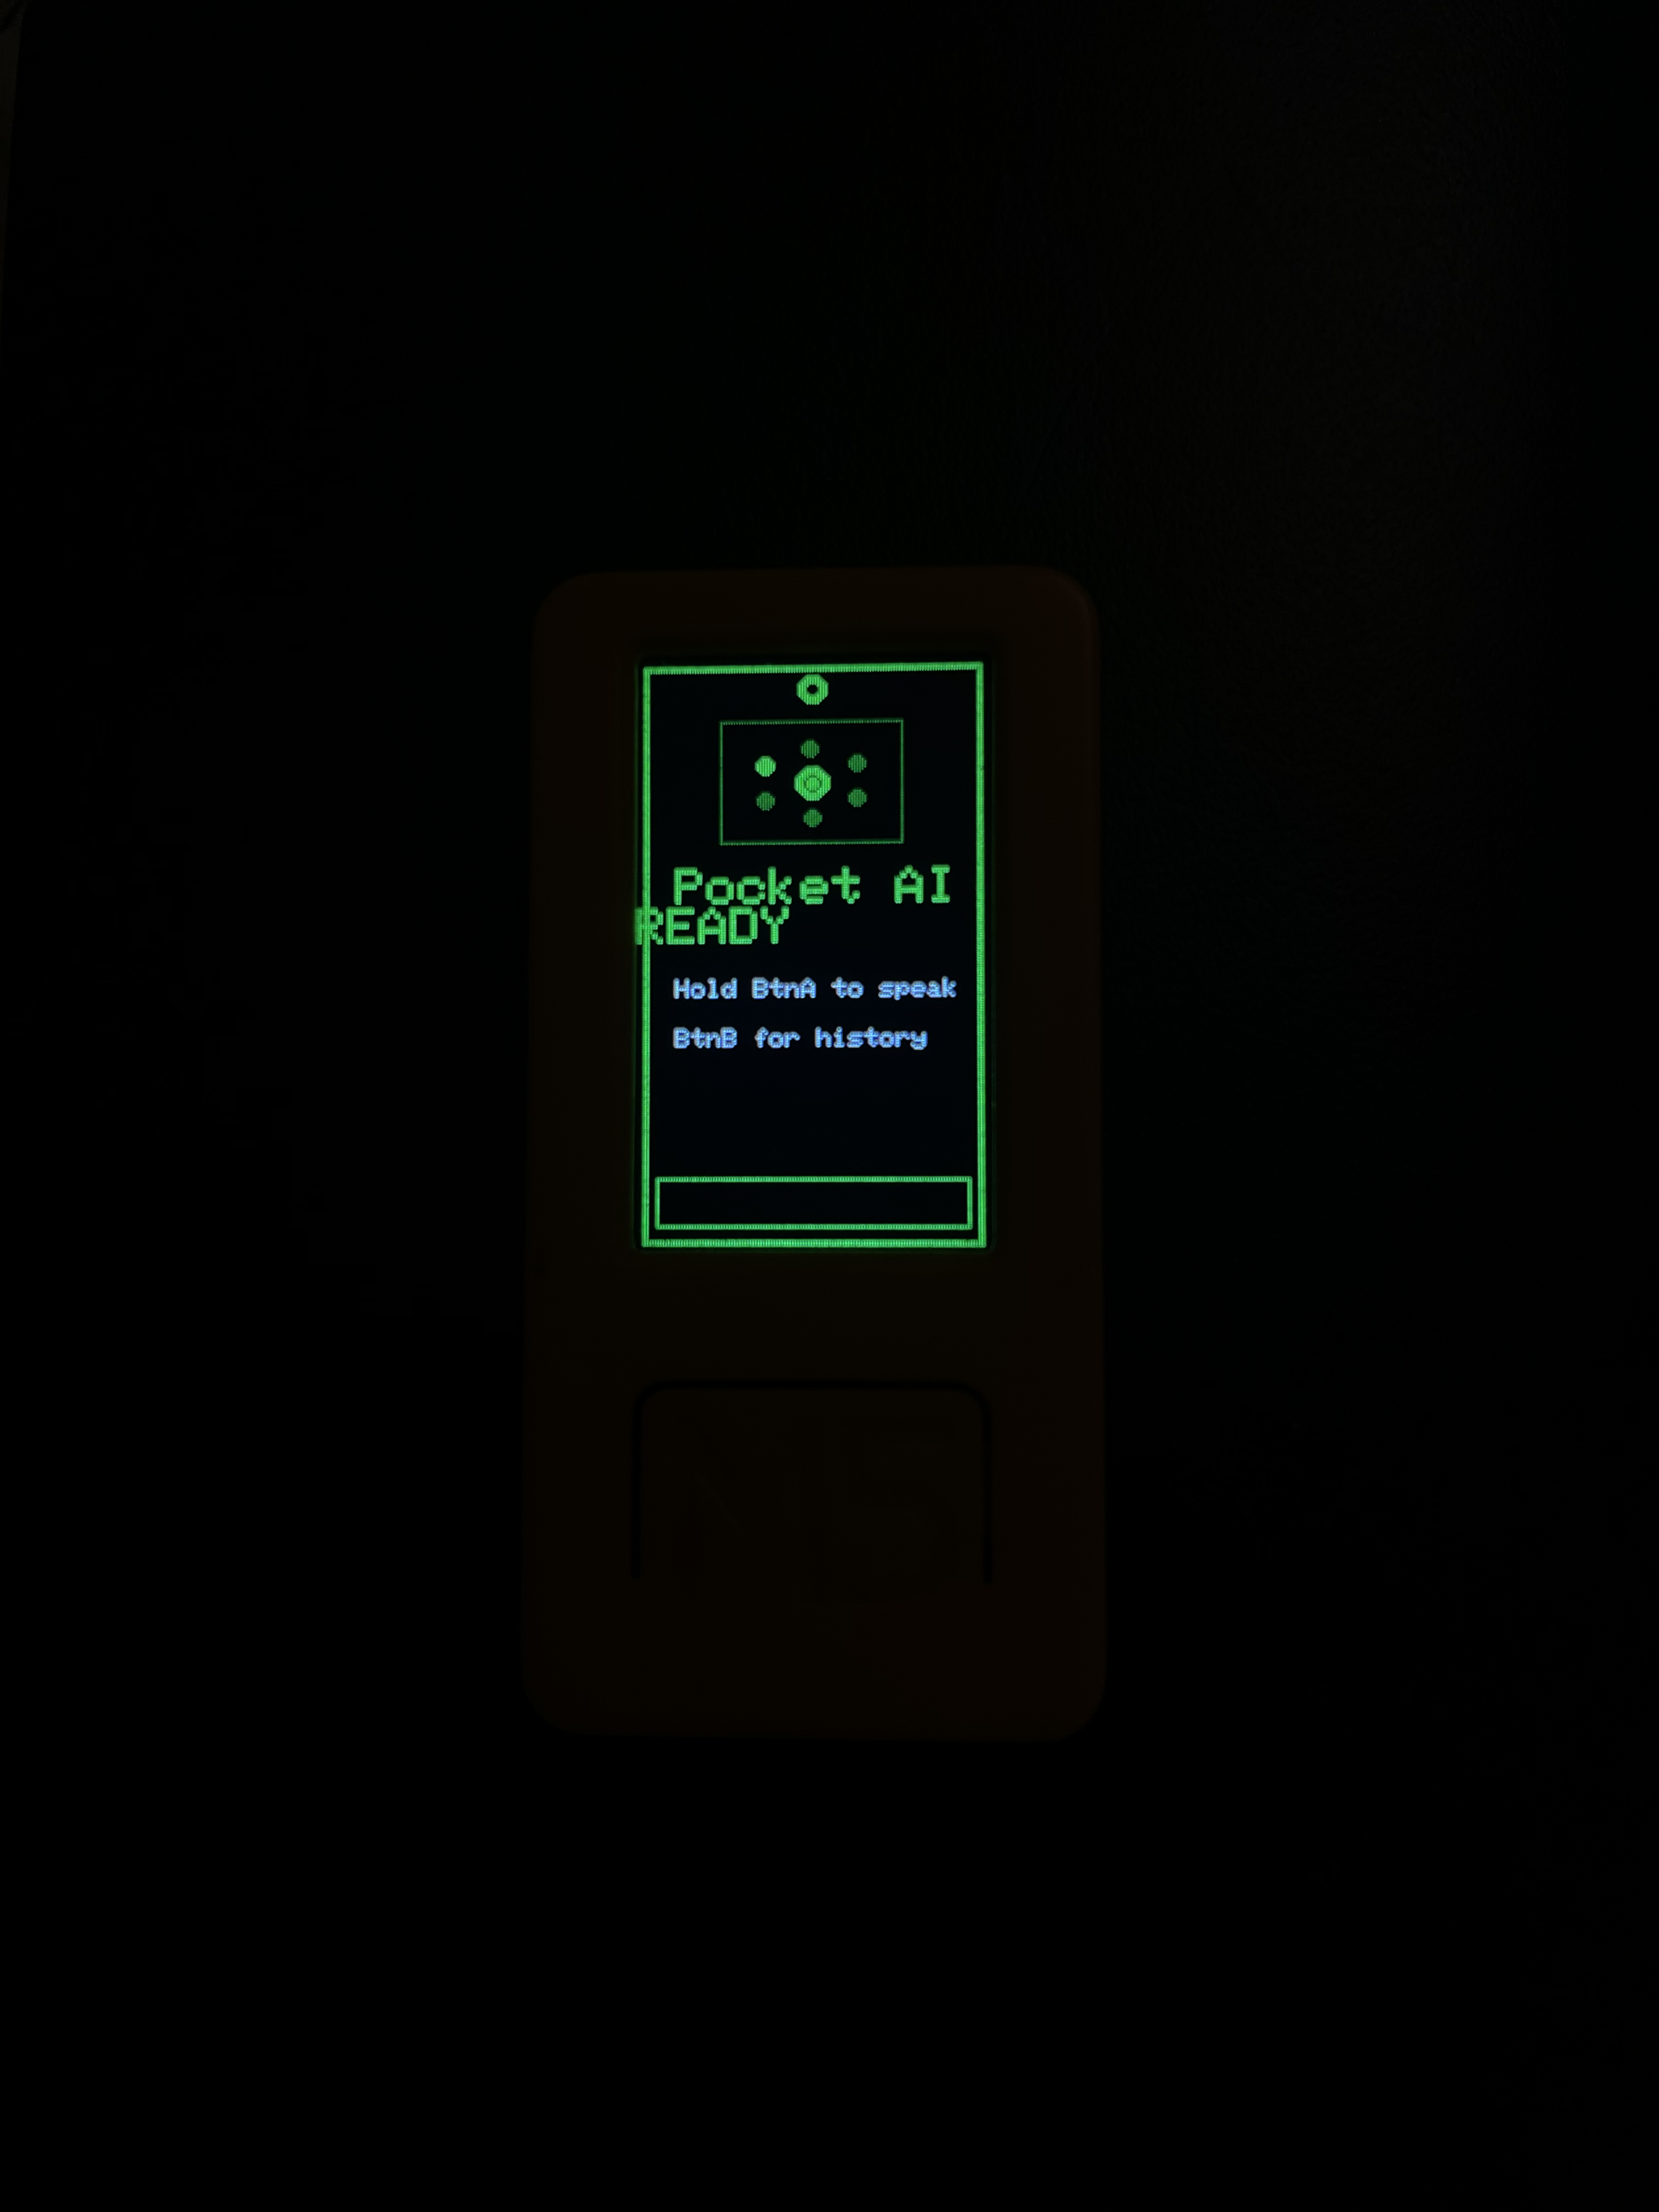
Now I have a working AI API, and I needed a client a pocket client. I first wanted to use Telegram to access it from my phone, but then I decided: why not build a project with my M5StickC Plus2 (ESP32)? The device has a microphone, so I can record voice, convert it to text (STT), send it to my API, get a response, and show it on the screen. This is a simple project and it works great. I named it Pocket AI.
Now I’m going to share some simple information about the plan, the AI architecture, and where I got inspiration from.
Inspiration
I got inspiration from the Marvel universe (J.A.R.V.I.S / F.R.I.D.A.Y.), and from the DC universe (Mother Box / Father Box). I also love Batman's Batcomputer because I'm a nerd.
_from_Invincible_Iron_Man_Vol_2_11_001.webp)
J.A.R.V.I.S

Mother Box
so I decided to make my own AI my own JARVIS because why settle for Siri when you can have a sarcastic genius in your pocket?

Tech stack & system design
I hate choosing the tech stack, but I have to.

Hardware
- M5StickC Plus2 (ESP32)
- Built-in microphone for voice input
- Built-in screen for showing the assistant’s responses
On-device software
- Record audio on the ESP32
- Send audio or text to the backend over Wi‑Fi
- Render the response text on the device display
Backend / API
- FastAPI as the web server for your AI APIs
- Endpoints typically look like:
/stt(speech-to-text)/chat(LLM inference)/tts(text-to-speech) (optional, if you add audio output later)
AI layer
- Base model: mistral-7b-finetuned (from Hugging Face)
- Hosted behind your API, so the device stays lightweight
Data flow (high level)
- ESP32 records audio
- Audio is sent to the backend
- Backend runs STT and sends text to the LLM
- LLM response is returned to the device
- Device displays the response
Implementation (M5StickC Plus2)
Now I started building the M5StickC Plus2 client firmware. The goal is simple (and honestly a little magical): record audio, ship it to my backend, get a text reply, and show it on this tiny screen like it’s a pocket-sized JARVIS.
My platformio.ini looks like this:
[env:m5stick-c]
platform = espressif32
board = m5stick-c
framework = arduino
board_build.f_cpu = 240000000L
board_build.f_flash = 80000000L
board_build.flash_mode = dio
board_upload.flash_size = 8MB
board_build.partitions = default_8MB.csv
board_build.filesystem = spiffs
build_flags =
    -DCORE_DEBUG_LEVEL=3
    -DBOARD_HAS_PSRAM
    -mfix-esp32-psram-cache-issue
lib_deps =
    m5stack/M5Unified@^0.1.14
    tzapu/WiFiManager@^2.0.16-rc.2
    bblanchon/ArduinoJson@^7.0.4
    earlephilhower/ESP8266Audio@^1.9.9
    bitbank2/AnimatedGIF@^2.0.1
I wrote most of the firmware with help from Claude (Sonnet). It was my first time building a full microcontroller client like this, so having an AI “rubber duck” that also writes code was… extremely convenient.
For the core request flow I only need networking, JSON, and M5Unified:
#include <ArduinoJson.h>
#include <HTTPClient.h>
#include <M5Unified.h>
#include <WiFi.h>
#include <WiFiManager.h>
Note: I experimented with additional audio output libraries earlier, but the main concept of this post is the record → STT → chat → display loop, so I am keeping the includes minimal here.
Configuration
I decided to protect my backend with a simple API key. The device uses a single API_END_POINT base URL.
// === Configuration ===
const char* API_KEY = "JWT_API_KEY";
const char* API_END_POINT = "http://localhost:8000";

// === Audio buffer (PSRAM) ===
int16_t* record_buffer = nullptr;
size_t record_size = 0;
const size_t MAX_RECORD_SIZE = 1024 * 500; // 500 KB max
const int SAMPLE_RATE = 16000;
Dialog history (on-device)
Then I added a small ring-buffer-like structure for local chat history (user prompt + AI response).
// Dialog History
struct Dialog {
  String userText;
  String aiResponse;
  unsigned long timestamp;
};

const int MAX_DIALOGS = 10;
Dialog dialogHistory[MAX_DIALOGS];
int dialogCount = 0;
int currentDialogView = 0;
Add dialog entries (user input + AI response) to the local history buffer, and shift the array when we reach the max limit:
void addDialog(String userText, String aiResponse) {
  if (dialogCount < MAX_DIALOGS) {
    dialogHistory[dialogCount].userText = userText;
    dialogHistory[dialogCount].aiResponse = aiResponse;
    dialogHistory[dialogCount].timestamp = millis();
    dialogCount++;
  } else {
    // Remove the oldest entry by shifting the array left
    for (int i = 0; i < MAX_DIALOGS - 1; i++) {
      dialogHistory[i] = dialogHistory[i + 1];
    }
    dialogHistory[MAX_DIALOGS - 1].userText = userText;
    dialogHistory[MAX_DIALOGS - 1].aiResponse = aiResponse;
    dialogHistory[MAX_DIALOGS - 1].timestamp = millis();
  }

  // Always point the viewer to the most recent dialog
  currentDialogView = dialogCount - 1;
}
Sending audio to the backend, getting a response, and rendering it
This is the part where the project stops being “a board with a screen” and starts feeling like a tiny assistant:
- Hold the button to record audio from the microphone.
- When recording ends, send the recorded audio to your backend’s STT endpoint.
- Take the transcribed text and send it to your backend’s chat endpoint.
- Render the response on the screen.
- Store the pair in
dialogHistoryso you can browse past prompts and answers.
Minimal libraries
For this flow I only needed Wi‑Fi, HTTPS/HTTP, JSON, and M5Unified:
#include <ArduinoJson.h>
#include <HTTPClient.h>
#include <M5Unified.h>
#include <WiFi.h>
#include <WiFiClientSecure.h>
#include <WiFiManager.h>
Configuration
I kept configuration intentionally simple: an API key and a single base URL for my backend.
// === Configuration ===
const char* API_KEY = "JWT_API_KEY";
const char* API_END_POINT = "http://localhost:8000";

// Audio buffer (PSRAM)
int16_t* record_buffer = nullptr;
size_t record_size = 0;
const size_t MAX_RECORD_SIZE = 1024 * 500; // 500 KB max
const int SAMPLE_RATE = 16000;
Sending the recording to /stt
My backend expects a small audio payload and returns JSON.
The important idea is that the device sends the recorded buffer, then reads back a text field:
String sttRequest() {
  HTTPClient http;

  String url = String(API_END_POINT) + "/stt";
  http.begin(url);
  http.addHeader("Authorization", String("Bearer ") + API_KEY);

  // Pick the content type your backend expects.
  // If you send raw PCM, use application/octet-stream.
  // If you send WAV, use audio/wav.
  http.addHeader("Content-Type", "application/octet-stream");

  int httpCode = http.POST((uint8_t*)record_buffer, record_size);
  if (httpCode == HTTP_CODE_OK) {
    String response = http.getString();
    JsonDocument doc;
    deserializeJson(doc, response);
    http.end();

    if (!doc["text"].isNull()) {
      return doc["text"].as<String>();
    }
  }

  http.end();
  return "";
}
Sending the text to /chat
Once I have transcription text, I send it to /chat and read back a single string response:
String chatRequest(String input) {
  HTTPClient http;

  String url = String(API_END_POINT) + "/chat";
  http.begin(url);
  http.addHeader("Authorization", String("Bearer ") + API_KEY);
  http.addHeader("Content-Type", "application/json");

  JsonDocument req;
  req["text"] = input;

  String payload;
  serializeJson(req, payload);

  int httpCode = http.POST(payload);
  if (httpCode == HTTP_CODE_OK) {
    String response = http.getString();
    JsonDocument doc;
    deserializeJson(doc, response);
    http.end();

    if (!doc["response"].isNull()) {
      return doc["response"].as<String>();
    }
  }

  http.end();
  return "Error getting response.";
}
The main loop: record → STT → chat → render
The loop stays simple. I treat the device like a “push to talk” client:
- While the button is held: record to the buffer.
- When the button is released: call STT, then chat, then render the result.
I keep the UI code separate so the network logic stays readable.
Result
With these pieces in place, the device can record audio, send it to the backend, receive a text response, and display it on the screen. It is basically push-to-talk, but for your own AI.